Wednesday 29 August 2018

Going Around in Circles.

Now that the background work is complete down one side of the truck, it's time to start on the more interesting stuff.


However, before I got to grips with more challenges inside, I had another look at the Masai windows. Their suggestion regarding a DIY repair didn't mention that the bare metal would have to be etch primed to give the new paint any chance of adhering. Without primer the topcoat would flake off quicker than a leper's lips so possibly the etch primer wasn't applied to the frame to begin with, hence the problem. Anyway, I've followed their instructions to the letter on the OS window and we'll see how long this "repair" lasts. The NS window I've done my way. They haven't bothered to respond to my whinge about their answer and "solution". Will I buy anything else from them....?


Back inside. We explored the best arrangement for the fixtures a while ago, and decided that to get decent  - read "barely possible" - access to the storage bins the fridge would have to be on sliders. This would also allow it to be moved to the centre aisle for La Chef to get easier access; the benefit here would be it could be opened fully without having to tip the driver's seat forwards, and could provide extra worktop space closer to the hob. Sliding it back to the OS is necessary when on the move otherwise it blocks the view through the blindspot window.

The runners clear the Wolf box so this storage- and the single bed base - still works although I'll have to sleep the other way round with my feet at the front end.


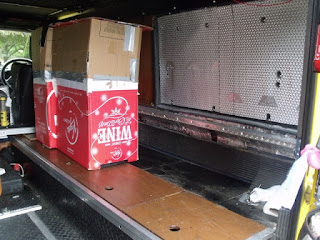
I had a pair of heavy duty slides that had originally been used to mount video projectors. These can take serious loads but are really lightweight and superbly engineered. I spent the whole day fiddling about with these and eventually had them mounted so that they were level, square and solidly fixed to the truck bed.
I was very pleased with the result...until I mounted the (empty) fridge on top. Given the restricted access since we can't get in front of it to pull it out the fridge didn't want to slide very easily at all. It worked, but only just and bearing in mind this was without the top extension or anything in it, I was forced to admit that it didn't work well enough.
The problem, I think, is the Delrin lining to the slider mounts just doesn't have the necessary "slipperiness" to work in the way we need despite plenty of silicone lube. A wasted day, going in circles trying to get everything to work and ultimately failing, but better to admit it now rather than having to do it again later when other stuff will be in the way, like the new seats.


I contacted Exmoor Trim to see if they could replicate the seat I already have. They asked me to send a photo. That was over a week ago and no response. Maybe it's me? Harrumph!

Little bits'n pieces...blind spot mirrors - the little 50mm ones - stuck to the door mirrors, which give an improved view that's altogether safer than before.


Then there's the net pocket on the passenger side, at the special request of the Navigator,
that holds water bottles and tea flasks and stops them rolling around and annoying the Driver every time we turn a corner!!!


The CB radio is re-installed in the very handy overhead tray that comes with the Alu-Cab roof. There's also plenty of storage up there for maps and guidebooks too, although they'll probably need some kind of restraint given our experience with my DIY version. Getting showered with books on every steep upslope became a bit predictable. We removed the handle from underneath the "ceiling" too - it was just low enough to whack us on the head if the roof is down.


After a few more "ups and downs" with the roof we've worked out that if it's pulled down too quickly the air can't get out and this makes the fabric "balloon" and get trapped in the side seals. This is made a bit worse if the bungee cord that gathers it all in isn't set high enough. All little things that you only work out by trial and error. It might be better to leave the tops of the side panels undone by a few centimetres to allow the air to escape more easily.

The new door seals will take along time to bed in, so we've closed the enormous draughty gap on the driver's door with rubber exclusion strip.


Not only is it now air and water tight, it also makes the door close with an even more expensive sounding "thud" than it had before after the vibration damping stuff was stuck into them.


I'm now waiting for a tube of Tiger Seal (which is apparently lost in the post) so I can fit the new heated back window, and some heavy duty drawer runners that will hopefully solve the fridge access problem. Everything remotely useful has to come by mail order - I can't even buy a stainless steel screw anywhere within 40 miles...the joys of rural life!

Monday 27 August 2018

Taking a break.


We gave ourselves a weekend off from playing with our toys and did some culture instead...


that's if you consider, as we did, spending a soggy Saturday evening with 25,000 pissed-up Picts wearing Saltires as cloaks and jumping up and down in the mud to "Beat The Drum" and "Stamping Ground" as culture...


Yep - Aye - we went to see the final concert of Runrig - and what a great night it was.


The venue couldn't have been better chosen, in the fields below a floodlit Stirling castle; the music was predictably outstanding and the audience "engaged", as they say. A good craic. A great band said "goodbye" very well. Hard to believe that they've been around as a band for all of my adult life....

On the way home I was reminded of why I've been trying to work out some kind of cruise control for the throttle. After 4 hours with my right foot flexed at about the same angle it became quite sore and when I got out to refuel I was hobbling. The same thing happened when we were going through Spain - hours of almost fixed-throttle driving on almost empty motorways left my ankle almost permanently bent out of shape. Some kind of manual control of the gas pedal would be useful when the compressor is running, too, so we can have the alternator work a bit harder to replace the electrical juice to the battery. The latter should be easy, not sure about the cruise control, though.

The wall (carpet) lining material has arrived and is a perfect match for the headlining under the bed, and it came with a can of spray glue as well. I've finished the foam insulation so now we should have a good base to stick the "carpet" to. This should give a more muted feel to the sound in the back as well as being warm to the touch. This ought to help with our anticipated condensation problem and generally give a more professional look to the finish. Another nod to the moisture issue is this slot that we cut in the side panel. Once again, the cut took more time than necessary since we measured 4 times before cutting once.


This is covered by louvres on the outside, fixed in place with pop rivets..


 and this sliding vent on the inner:

The things holding it all aligned are called "clecos" - very useful things.

 With all the cutting and insulation done, it was time to get started on the cosmetics. Lining "carpet"; actually, more like a thick felt.


  I had a test run on one of the vertical pillars, and a good job I did....until I realised, not being a soft-furnishings sort of bloke, that the stuff had a "good" side, and the Other One.  You'll have worked out that I had a 50/50 chance of either getting the glue on the Right Side or the Other One. Which one did I choose?

Anyway, having realised I managed to peel it off - destroying it in the process - but learned the lesson the cheap way. Would've sworn a bit if I'd done a large panel first....


This is the final assembly. Cargo rail and load straps fitted, the top brackets of which hold the "pelmet" in place. The LED lighting strip hooks over two of the load strap brackets so we can easily move it outside. It's a standard strip, glued to a length of ally door trim.

We made a removable panel- see above - for the "big bit" of the driver's side since I needed access to the nuts that hold the external accessories. I thought about just glueing the liner to the insulation but this would've been a) lazy and b) a potential difficulty if we ever want to take those parts off, perhaps for a respray. The panel can be easily removed once the trim for the rear side window has been taken away. This took some thought to ensure that this would be possible without interference from one side or the other. All done with 6mm ply and some woodstain/varnish to make sure that nothing would warp.  Must say that I'm impressed with the stuff we used for the lining - easy to form around odd angles and curves because it has some stretch. Once the cargo rail and straps were re-installed, this bit is done. The lighting strip is removeable for use under the awning, but I put in a dimmer switch for those romantic evenings indoors...

A little bit of carpentry, and the driver's side is looking finished, or at least neater...

I've just noticed the untrimmed edge above the window - should've used a torch to light things up a bit


The lack of overhead cover to the back door was something we noticed last weekend, so I applied myself to a solution using, as usual, scraps and junk that was (were?) laying about.

I've had all this stuff knocking about for years, mostly originating from the skips at work!


 This is what we came up with as a "first try".


This didn't survive the troop-trial on the driveway. The plastic brackets, seemingly good enough on the bench, couldn't take the leverage of the long arms and cracked. Having removed all the internal trim panels to bolt it all together and then replaced 'em , I had to take them all off again to dismantle everything. 

Back to the workbench, and a complete re-think. As usual, I'd over-engineered the first try, and came up with a much better solution the second time around using the ever-popular bungees, the windbreak, some fibreglass tent poles and 2 steel awning poles:

As a try-it rig, we used a fibreglass tent pole and bungee hook to support the cover. It's braced around the "helper strut" for the roof.


In fact, if I stitch a length of cord along the edge that mates to the vehicle, I don't need the fibreglass pole to hang it off. The cord will take the strain and 2 bungee hooks over the helper struts will anchor it at an appropriate height. The real triumph here is the catenary arch. This is formed by several fibreglass tent poles flexed under the canopy and gives a nice taut roof that will allow the rain to run off and not pool. For anyone who's clever enough to note the slope back towards the truck...Well Done, but as the vent of the roof tent overhangs the cover there shouldn't be much, if any, run-off in that direction. 

 I hope. 

The actual cover is the same one we use for a windbreak and is supposed to be a bird hide, which is why it has a zippered flap in it, which is just at the right place to be a window!

I'm not keen on the guy lines to hold the steel poles up, and neither the steel poles, actually. My preferred aluminium poles are quite expensive, so we'll go with the heavy, cheap ones until we're sure it all works properly. Previously I've used some cannibalised aluminium crutches to make adjustable poles, and bloody useful they've been. High-quality material that apparently has a very short operational life, given the number I've seen thrown away. Must find some more....

Tuesday 14 August 2018

Troop Trials of the New Roof.

Our second excursion took place this weekend, and we have a bit of work to do....


We took Elly to Stonehaven for a night out. This didn't work out quite as we'd planned as the town was chock-full of people and cars. With nowhere to park we had to just pass through and decided to pay a visit to Dunnottar castle instead. 
 
image from Trip Advisor

Arriving there we found the carpark full and the off-road carpark - the verge - full for a mile...We had our picnic lunch at the end of this line and then disappeared southwards to our overnight spot.


We'd booked in as a single tent plus car. The warden's rep queried this. Were we not a "campervan"? If so we'd attract a charge of £20 per night, not the £10 for a"tent + car". I pointed out that the 6-berth bungalow tent almost next to us had a car parked alongside and was taking up 4 times the area that we'd occupied, and were being charged £10. I guess if we'd pulled out a pop-up tent and thrown it on the ground alongside Elly, the debate wouldn't have arisen...we all had a laugh about it and I paid £10.


After another comfortable night we awoke to a much wetter view than the night before. It'd obviously been raining for quite a while but I hadn't heard a thing. In a tent, of course, the rattle of raindrops on canvas would've disturbed my slumbers straight away, but the tin top overhead deadened the sound completely. We did notice that the outer corners of the mattress squab that goes over the "escape hatch" were wet. The cause of this needs investigating but is clearly either the zip or the seam in the corners of the tent fabric. The seams are supposed to be sealed but there's clear daylight visible through the stitching. Most tents need "conditioning" to let the threads expand and create a waterproof seam, but this hasn't happened with these. They've had 2 good soakings now, so perhaps it's time to get out the seam sealer and give them some attention.

The second area to be improved is the overhead cover outside the back door. The roof tent gave a superb "porch" that protected us from the rain when the tent was open. The overhang of the Alu-Cab doesn't provide anywhere near the same level of protection, so we're going to improve on that somehow. 

One reason for the weekend was to try to work out a new arrangement for  the back end. Lots of options here, the obvious one being to rip everything out and start again from scratch. This'd be a bit  of a waste of materials and experience - some of what we have works very well. Let's face it, after so many experiments it ought to! The thought of starting school again...not appealing..surely there's something we can preserve?

The increase in the available height would allow us to raise the cooking area. This was the premise from which the whole exercise was begun. It now appears, after more thought, that the ability to stand up and cook is ideal "but not necessary all of the time". Can you hear the silence and measured breathing here? 😩. In fact, the 160mm or so of extra headroom even without folding the sleeping platform into the roof gets rid of the claustrophobic feeling of brushing against the ceiling all the time.

So.....we both stood inside again and discussed the options. The cardboard mock-up of the Engel was put in and moved about - much easier than doing that with the Real Thing. 
The fridge can't go on the other side as it'd block the "blind spot" window.

 We want to keep the storage bins but the 2 smaller ones at the front end are blocked by the Engel in this configuration. Options are to make access from the side, put the Engel on a slide so we can pull it out of the way or accept that it's "dead space". Not happy with the latter - a bit like surrender! We'll find a way....

I assembled a folding seat that we'd got from eBay at a bargain price.


With the Engel at the end of the storage area, there's room for 2 of these seats side-by-side. The squabs lift up to allow us access to the storage underneath and are handily each the same width as the lids. We only have one seat at the moment and the material is, I think, out of production, so we may have to buy a non-matching second seat and 2 dust covers - probably a good thing anyway.


We made a dummy cooker and set it at the level that would allow stand-up and sit-down use, and put the folding chair in place to see how much room 2 of them would need, side-by-side. Tried to imagine it all being used; which doors needed to open at the same time, what gets in the way of something else, all that ergonomic stuff. Lots of compromise solutions suggested themselves, but in the end we came up with something that seems to work given that there are some "must haves":

Engel fridge and top extension is an example. 


This "TwoZone" accessory only seems to be available in Australia. We found it very useful to use it as a fridge and keep the larger lower section as a freezer. It takes up a lot of space but it's worth it. Cold beer! A steak when 4 days out from the market is a real bonus.

And some "can't do anything about", like the position of the water storage, for instance.

Of the present arrangements, the "NAAFI flap" is so useful we wanted to keep it.


For those not old enough to remember, the picture shows the reason for the description...


This opens up the back end to the view, fresh air and conversation. 
We haven't sold much tea or ice cream as a result of having it, but it does allow passers-by to chat.😊


We want to be able to use the inside tap - and thus a sink, even if it's a removable bowl - and this suggests it should be on the side it is now or we'd have to run plumbing and wiring to the other side of the vehicle. By not having the cooker so high we could keep it and the sink roughly where they are now and still keep some of the opening area of the flap. It will still leave enough to give a useful view and, more importantly, ventilation.

I'd been trying to figure out how to build an extractor fan into the wall on the other side, and it wasn't going to work very well. 
The fact that cooking smells and steam, plus the wet by-product of cooking on gas, hasn't really been a bother before was because our bed was on the other side of the roof. Now, all that damp atmosphere was going to be enclosed and we need some way of getting rid of it. Opening the doors and windows is the obvious way but not ideal, especially if it's wet, windy or calm and midgie. The ability to use the NAAFI flap as a vent is good, but it has to be alongside the cooker to be effective. If the weather is too bad even for that, there's room to install a small extractor fan, perhaps made from a computer fan like Daphne's, in the flap. We've tried an insect net over the opening but with even a slight breeze it can get too close to the flame. Maybe I'll continue with this experiment:


This is a duct, electric motor and model aeroplane propeller donated to the cause of DIY by the engineering manager at work. It shifts a lot more air than a computer fan, but it's got 4 times the area.

This brings us back to the choice of cooker/heater. We thought about carrying a single burner gas stove to use on the drop-down table on the back door. 
This needs the door to be open while the burner's in use, which is a bit of a limitation and no good for heating. Using the existing double-burner stove introduces a lot of moisture into the air; this is bad enough from cooking but if we wanted to use it for heating too, it'd be impossible in cold weather. Imagine all that wet air condensing on everything? Camping Gaz or propane doesn't work so well in a cold environment so we'd be forced to keep the cylinder inside. This is what we do now and I've never been happy with the idea but because we were sleeping "outside", it was a compromise we could live with. We're not prepared to make that compromise any more, now that we're sleeping in the "same room". Nonetheless, the burner/sink combo in the Smev range here...

...seemed to fit the requirements quite well and at a reasonable price. It'd only do cooking, though, but we thought that leaving a burner on for a while would heat the truck up nicely if it weren't for the moisture it'd produce.

Petrol stove? We had one of these for a while, a Coleman. Worked well but produced fumes and I was never really happy with the need to pressurize the fuel to get it to vapourise. I've seen these stoves flare up with spectacular results, which would mean only using them outside the vehicle. This wouldn't work most of the time.

A diesel powered heater like an Eberspaecher is one option for heating; the common solution but expensive. 
 These are apparently the "industry standard" for heaters and are fitted to, for instance, Pulse ambulances. There are a number of variations on this theme ranging from cheap Chinese "knock-offs" to UK-supplied lookalikes with a decent warranty. Added to the list of "possibles".


  We heard a (false) rumour of a combination cooker/heater made by the same company and it was while researching that we found this:


diagram from the Wallas website
These are expensive but they are fuelled by diesel which is obviously quite handy as we have a tank full of it already. The extra height needed for the "standing cook" option would be provided by the need to raise the hob by the depth of the body. The heater option is built-in. The diesel is burnt to heat the hob and the heater fan blows recirculated air over it, so no water vapour gets into the truck.

There are a few You-Tube videos with detailed reviews of these options which we've seen. While seemingly not as fast as gas the Wallas cooker is safer, cleaner and does 2 jobs in one without the drawbacks of gas. The other advantages quoted on the website like "As diesel is a non-pressurized fuel there are no tunnel or parking concerns. No worries when looking for parking on your way to the opera in the city centre." weren't on our list of concerns, but I guess they cater for varied tastes...This is definitely a contender.

A company called Truma offer a combination heater/water boiler, but this only does part of the job and needs LPG or Propane as fuel, but can run from electricity as well. Fine for campsite use but no good off-grid as our limited-capacity system couldn't run it.

Oh - nearly forgot...there's always this:

Our woodstove was bought as a nice homely-kind-of-thing to have on a wild camp, and it'd provide constant hot water. It does that but needs constant attention to do so. Fine if we've nowt else to do, but keeping boredom at bay isn't a problem we often have, I'm glad to say, so our little Frontier stove doesn't get as much use as we thought it might. And no good for cooking, either. The heat isn't controllable or predictable and the stove needs shelter and the correct fuel (dry camel shit works best!) to be a viable alternative to a gas or other stove.

The above isn't, by any means, a complete review of all the options but that would probably take a week and bore us all to death.We're still debating the options but, despite the cost, we favour the Wallas hob/heater combination for a long term solution. I'm just off to see how many pennies we have left in the piggy bank.

Friday 10 August 2018

Back on the roundabout.

This time last year we were making the "final" adjustments to Elisfor's interior, incorporating the lessons learned after our Pyrenees trip and congratulating ourselves on an almost perfect solution to living out of a Defender.

 That, as they say, is history. With our new and expanded living space, it all has to change again. Needless to say, the kitchen has got to be done all over again and it's more than just changing the doors like I might do in the house. Oh No. Everything new. A bit like having a baby....

So, I've shoved the question to one side until we've had some more thinking time. For the time being, I've concentrated on putting the electrics back together and doing some more insulation.

 This is the new site for the work lamp. It has to be squeezed into the corner - the high-level reversing lamp is on the other corner - because, of course, the obvious bit of the roof now elevates and I didn't want to have to run about 5 metres of extra wire on both sides. It'd have to go from the back corners to the front and then up the side of the new roof.
I also fitted the vertical "assister" gas struts that Larry seemed to think we didn't need. They don't, actually, help much when pushing the roof up, but they hold it sufficiently clear of final closure to let us check that everything's folded away properly. Before we fitted them I had to hold it up while Sue ran around tucking things in, if she could reach. I think that once we've worked out just where to put the bungee that gathers the side curtains this won't be a problem.

The Hannibal awning has gone back onto the side, on the vertical "upstand" of the Alu-Cab system. Both the supports have a bracing plate on the inside and the upstand is 3mm thick, but I might put a larger load spreader on the back eventually - there's a fair amount of weight and leverage there and we wouldn't want anything to crack. 


The awning will now be about 100mm lower than before, but still just high enough to walk under without brushing my head against it, which would be really annoying...

The ladder that gave access to the roof when we had the roof tent can't be used in the same place as there's no gutter to hook into. With the bonnet spare wheel temporarily removed - who needs 2 spares outside of Morocco? - it's difficult getting onto the rack since it's now about 170mm higher. Although I can use the mast steps these aren't ideal, so I cut the legs off the Hannibal ladder and had the local fabricators weld them back in a place that let me put the ladder on the side instead. There's a gutter rivetted to the side of the upstand at the front end and this I've used to stabilise the top,  but all the weight goes onto the legs. I hope.


I tell you, when I retire I'm gonna get myself a TIG welder at set up in business....I reckon, since I'd done all the prep, clean-up and re-paint, this little job might've taken the chap less than 15 minutes. It cost me £20. Not a bad hourly rate. I'm not complaining - I don't have the kit to do it myself - but it got me thinking.

Just because I could, I put another mast step on the back end which gives me a step up onto the spare wheel and from there to the roof, and it also serves as a grab handle for Sue to get in and out, having previously used the ladder.


In case you're wondering why this determination and necessity to get on top, this is what goes up there a lot of the time:

We're off to Stonehaven this weekend

 I thought that the extra height might be a problem when loading the kayak, but a piece of plastic drainpipe lashed to the back of the rack lets it slide up there fairly easily. It's a 2-person job though, which is never a great outcome, so I'll think of a better - solo - way later. The most difficult part of this was refitting the kayak carrier cradles. There's very little space between the bottom of the rack and top of the roof now, and getting the clamps into place was a struggle.
I have some different cradles - like vertical bars - but these can't be fitted at all because the bolts are too long and can't be inserted the other way round, so some creative thinking might be necessary there.

The solar panel has gone back under the front of the rack, which was also a tight squeeze to get the mounting tray underneath, but it's out of the way and in a proven location.

The inside already has a lot of insulation from noise (see previous) but now we've added some closed cell foam to beef it up a bit.
The side of the truck now has a layer of Silentcoat bitumen-and-aluminium panels topped by 10mm Noisekiller foam and now 10mm closed-cell on top of that. Hopefully this'll stop any moist air getting at the metal and keep some heat out - or in - depending on where we are.

Other stuff - larger door mirrors for example - have made an appearance while we've been deliberating on the roof question. 


These give a much improved view although the larger area makes them vibrate quite a bit more at speed. At speed? In a Defender? Well, actually Elly drives much better now all that rooftent weight is off the roof, and we came back up the M6 at a comfortable 70mph without emptying the gas tank at the usual rate, so something - probably drag - has improved a lot. They still have a blind spot, though, so that'll have to be sorted before we nearly crush another unfortunate Spaniard. The mirrors were only changed, really, because it was convenient to do it as I was replacing the front door hinges. These are stainless steel and look a lot better than the previous rusty items. I was going to paint them but since they're stainless and paint seems to peel off quicker than the barmaid's knickers on Boat Race night, I decided not to. One less job and I'm sure they'll "dull down" soon.

While messing about with the doors I noticed this:


This is the corner of one of the Masai windows we fitted less than 2 years ago. In fact, all the corners of both the windows are like this. I wrote to Masai some weeks ago but only got a response this week. They helpfully suggested that as "aluminium doesn't rust so this can't be corrosion", this "must be some kind of chemical reaction" from a car wash or salt and I should just sand down and repaint. Hmmm...and I thought decent prep and paintwork was supposed to prevent just this problem. After all, 23 years and the truck hasn't gone all lumpy like this and unless I've been seriously misinformed, it's made of ally too.😠

After all that messing about, we did manage to get away last weekend to christen the new bed...


This remote spot had a great view of the mountains when we stopped, but come the dawn the cloud had spoilt that a bit. Never mind, a peaceful night on a comfortable mattress and we could dress standing up - luxury!

Wednesday 1 August 2018

Elisfor Loses Her Head.

Lifting the roof. That's the conclusion we reached that we reckon will give us what we want. We retain all the advantages of the Defender as an "exploring off road" vehicle but gain the ability to live more comfortably inside.

The downside...the price. Nearly £8000 for the kit alone, and then it has to be fitted. This wouldn't normally pose a problem as our DIY skills are easily up to the job. The problem is manpower and suitable places to do the work. Mike built a small aeroplane in a garage once and could only get the completed fuselage out of the door by letting all the air out of the tyres....There's no chance of doing the work in our workshop-cum-garage and the muscle necessary to do the lifting we don't have. Then there's the fact that we'd be putting a lot more money into the vehicle that might not be justified given her age. A DIY build using sourced materials would be cheaper and easier to justify the cost. It would just take a long time.

This left us trying to work out how, if we made the investment, how we'd fit it all together. This is where LVB Overland come into the picture.

While researching the options I'd given them a call as they seemed to be the closest dealer to us. When I say close - a mere 420 miles - it gives you some idea of the logistics involved in obtaining anything more complex than a bag of sugar if you live this far north. Yes, they could supply an Alu-Cab roof but the lead time would be quite long as they're pretty much a "special order" item. They did have one in stock, though, but it was reserved for another client. If that deal didn't complete, would we be interested in it? We'd said we would and left it at that and heard nothing more for over a month.

So, while watching the rain beating on the windows and listening to Sue's coughing from her sick bed, I got a call from Larry at LVB. Did I remember our conversation? Yes, but had assumed it was now history. Not so! He had a roof but now no client - were we still interested? This was one of those "make your mind up" moments...Larry was clearly under some pressure and needed a decision, Sue and I hadn't discussed it in detail and we only had a vague idea of whether it would do all that we hoped and kind of favoured the DIY approach in slower time. With Larry still pressing for a deal, I said as much and with Sue being ill and not really able to concentrate on the question I had to say "sorry, wrong time". Larry suggested that a chat to one of his other customers might answer our questions, but we left it at that.
Not wanting to miss the chance I called the number he'd given me, not really expecting a response. I was lucky and got to speak to a lovely lady who was able to answer some of our questions and clearly loved her new roof. Hmmm...I made Sue another cup of tea and we had a chat...

Four weeks later, and this is what we have:


Fortunately we were able to co-ordinate the fitting with another planned visit "Down South" - Sue's graduation. If you've been following this blog for a while you'll know she's been studying for a MSc in Forensics and Criminology for what seems like an eternity; but the course is over, she passed with a Merit and we spent a couple of days in Leicester for the ceremony. 


This went well and Leicester is a fascinating city. The town centre that we paid a brief visit to is packed with interesting architecture and proper shops, unlike many "vanilla" city centres nowadays that seem to be clones of each other. Our celebration meal wasn't quite what we'd have chosen had we known the area a little better....the little family-run restaurant served great food, but we didn't realise until too late that a celebratory glass of alcohol was going to have to wait until later - the place didn't serve anything stronger than orange juice. Anyway, well done us...well, Mike helped with  some of the hard sums and emptied the waste paper baskets of half a forest-worth of rejected drafts!

We'd dropped the truck off at Doncaster and Larry loaned us a car for the trip to the University. Saturday morning saw us back at LVB...

Larry Butterworth outside his garage in Doncaster


Larry and his team had promised the job would be done, and they'd worked until 4-30 that morning to finish it. We arrived at 9-30 with no sign of anybody but Larry turned up a few minutes later having taken Elly to the car wash! How's that for service? The result is everything we'd hoped for: the engineering and finish is aircraft-quality, the amount of space it provides is nothing short of amazing and it makes such a difference to be able to stand up and stretch out. The extra room can be better used if we redesign (again!) Elly's back end so once we've finished the wiring and put some things back in that had to come out for the new roof, we'll get busy with the plywood once more.

There are quite a number of companies, mainly on the Continent, who provide bespoke campervan conversions of the Defender, and we'll draw some ideas from them. One of these is here and while we won't be spending that kind of money we'll have to produce something similar if we're going to do justice to the money already spent. Another solution, from France, is like this:


The old roof and headlining was sold via eBay prior to it being removed, and we dropped it off in Harrogate on the way home. Likewise the ladder extension that we found under a tree in Morocco. The Hannibal roof tent and Jumbo kit had been sold locally so, after all the dust had settled we managed to make up about 20% of the cost of the conversion. All we need now is a bigger garage door - with the added height of the Alu-Cab there's no chance of being able to work on Elly while staying out of the weather. Before, we could remove the rack and she'd just squeeze in, not so now. Given the difficulties of raising yet another roof - this one of tiles - I think it might be easier to build another one next to the one we have!