Saturday, 23 December 2017

Elecktrikery


Time to have another go at the electrics, I thought.


The original design had the fuses for the back end located neatly Out-Of-The-Way in one of the stowage bins. So neatly OOTW, in fact, that they were damned difficult to get to if Elly was loaded. Added to that the Masterpiece of Design that now allows us to move the Engel fridge OOTW neatly denies access to them. Rather than risking a hernia trying to move a fridge full of booze and other cold essentials, the fuses had to be moved.


 This entailed removing the passenger seat, so we did a few little modifications to the fixings for that, so we could get easier access to the battery box....more of that later,

The fuse box has now been moved from the back of the bulkhead to the front. While this reduces the rearward travel of the seat by a tiny bit, the ease of access more than makes up for that. While the seat was out, another 12v socket was added to make life a bit easier under the awning.
The socket is supposed to be waterproof and it might well be, but the cover doesn't seem to be a close enough fit to keep water out, so we'll see how it performs - Amazon, standby for a complaint if it corrodes. Anyway, I took the time to label all the wires in the battery box with plastic discs or bits of tape to make tracing faults a bit easier in future. I suppose I should really make up some kind of diagram to show where all the wires are going, but for the moment the photos will do.

The biggest pain if you fit seats that don't have removeable squabs - and that's the vast majority of after-market seats for a Defender -is that access to the battery becomes impossible unless you take the whole seat out. This is a nuisance. We had a think about our arrangements and, by slightly modifying the front fixings the seat can be tilted backwards just enough to get useful access to the batteries.


I wouldn't recommend this arrangement for any complex work, but to disconnect the batteries for maintenance it'll work well enough. With this in mind I disconnected the main battery prior to trying to replace the standard 65A alternator with our spare 100A unit. Unfortunately I couldn't get the bolts undone! I dunno why they're so stiff but the effort needed to shift them was beginning to round off the bolt head on the upper bolt and the lower one wouldn't move at all. Rather than risking sheared bolts or knackered heads I replaced all the wires and retreated. We'll have a re-think on this one later.

With the electrics disconnected, though, we had a re-jig of the dashboard.


The new-look office
Gone is the "eye-level" binnacle. Everything has been moved one level down since the altimeter that was in the middle level didn't work particularly well. This clears the top of the dash and I've put the ashtray back where it came from but modified it to be the mount for the OSM- and Tripmeter tablet. 

The ashtray with a mounting plate installed


..and a backing plate to hold a small tablet

The backing plate is the one we made previously that hangs from the mirror mounting. Used this new way it can be road-legal and might mean we can get rid of the Garmin for some of the time. The Garmin is still quite useful for Olaf routes though, so we won't get rid of it completely.


The "horns" don't need to be this big so they'll be trimmed off eventually, although often when I do things like that I find that I could've found another use for the thing I've just cut up - if I hadn't been so quick with the saw. 
The ammeter still hasn't been wired in since the LEDs on the T-Max system (the blackbox-with-yellow-writing) give me as much info as I need regarding the charging process. It fills an otherwise gaping hole- like the CHT gauge -  but I'm thinking of putting something more useful in its place, maybe an oil pressure gauge. An electrical one will be fairly easy (hah!) to fit and be a bit more useful. 

The move wasn't straightforward, of course, given that it involved disconnecting, re-routing and reconnecting wires but I only blew one fuse and everything works as before. I think....

The angled mounting for the gauges lets me see the faces very easily but I think I'll have to put some kind of blanking plate over the top and maybe underneath to stop stray light leaking out.

The front work light is now, at last, wired in. I debated whether to route the wiring via a relay but as it only draws a few amps I've run the power straight through the switch. It doesn't look very bright, though.


Finally, we got around to applying some of the stickers that people in the trade very kindly donated. A big Thank You to:


and
 for their support for our 2018 plans. 
We've got quite a lot of new kit on Elly and a lot of it has come from the suppliers mentioned above.

Friday, 15 December 2017

Something's still dripping...

...and it's not melting snow.


The fuel tank leak is now top of the list for fixing and we've been running the fuel level down to almost nothing to make dropping the tank a bit easier. With all the required spare parts delivered the stage was set, then this arrived:


The view from the kitchen window suggested that this was NOT the time to be taking Elly off the road! Given that the only reason we bought a Landrover in the first place was to cope a little better with the Highland Winter snow, it seemed a bad idea to be without one now it was back.


The weather improved a bit towards the end of the week so, with a lot of care and help from Ian Watt's guys, we took the tank out...


It was almost empty and actually nowhere near as heavy as I was expecting it to be. With hindsight I could've got it out myself easily enough but the reason I didn't try was 1. the lack of decent access underneath and 2. if it had turned out to be too heavy for me to handle alone, I'd have been in a bit of a jam. I didn't fancy being trapped underneath it, trying to stop it ripping free and yelling for help that wasn't going to arrive....the garage is quite a way from the kitchen!

So, it went to the garage - and a proper ramp - to be removed. The jetwashing I'd given it to get the crud off before we took it out has succeeded in removing most of the original paint. The bare metal doesn't seem to have had any primer on it, so no surprise that it just washed off in sheets. What was a surprise was how clean the steel was underneath. In fact, not a spot of rust at all - it looked, once I'd cleaned off the rest of the old paint, like polished aluminium and probably weighed about the same, too.


The old fuel return pipe was leaking from 2 places - around the seal...


...where 2 of the fixing screws had been stripped and were basically just resting in the holes. I fitted a new seal and pipe. The old pipe was probably OK but as we were there it made no sense to refit the old one.


The vent pipe - if that what it was for - is redundant and had been "closed" with another of PITA's bodges - see the post from last summer - so we replaced our "field fix" with the proper seals.


A coat of cold galvanising primer finished the prep...


and the last job was to refit the fuel sender unit. Now, a confession...I hadn't really inspected this bit of the pipework too closely. I thought I'd found all the bodges when we removed this masterpiece of engineering from the bottom of the tank:


It's fuzzy because I was laughing too much. All the fuel hoses turned out, once we'd got them off the fittings, to be too small for the pipes that they were meant to fit. Unfortunately I hadn't noticed that the correct nuts, back nuts and olive had been removed from the sender unit and a bit of rubber pipe substituted, clamped on with a Jubilee clip. This clip was rusted solid and the attempts to free it saw the IW fitters break the pipe on the sender. With hindsight, we should've just cut the hose away. It being Friday afternoon, there was no way we were going to get a replacement sender much before the middle of the following week, so I decided to try to fix the broken one.


The remains of the broken plastic pipe can be prised out of the connector
I drilled out the old fitting with an 8mm bit having pulled out the pickup pipe. This pipe has a tiny O-ring on it, so I was able to push the pipe through the new hole and it still sealed fairly well. With enough pipe sticking through to fix the fuel hose onto, I filled the fitting with JB Weld. 

The pickup pipe pushed through the internal sleeve and bonded in place
 Putting it all back together was easy enough having given the tank a coat of black paint and some underbody sealant on the vulnerable front face. Now we come to the reason for all this work....

The serial number on the hose gives away its proper use.


This is a 120mm length of Camping Gaz hose. It happens to be almost the correct internal diameter to fit onto the fuel return pipe on the top of the tank, which is presumably why PITA chose to use it instead of spending about 5 pence on a length of the correct fuel hose. The little Jubilee clip wasn't done up tightly enough to crush the hose - a bit too big (unlike all the other bloody hoses we've changed which were too small) - onto the pipe. The hose was so loose it just pulled off. Added to that the material it was made from isn't designed to carry diesel fuel so has gone harder than bone. Not only did the whole setup leak whenever the long-range tank had fuel in it, the drips blew back along the tank to the back, collecting dirt as they went and plastering the bottom of the tank with filthy, smelly crud. After a while the whole back end stank of fuel. The leak only stopped when the level of fuel in the LR tank dropped to zero since it was now below the level of the return pipe. 3 days and a lot of effort and money to repair this silly bodge......

The "new" tank has had all the areas that are likely to leak or need monitoring moved to more accessible positions, so any future work hopefully can be done without having to dismantle half the back end of the vehicle. Another lesson learned.


Thursday, 16 November 2017

Beating the Bushes.

Panhard Rod bushes. Little bits of rubber and a steel tube, all encased in a tin skin. Ought to be easy to change, I thought, until I read the Haynes Joke Book and realised that a 20 tonne hydraulic press might be a good tool to have lying about the workshop...


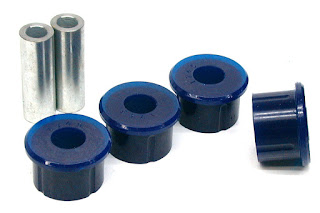
Yeah, OK. That aside, I decided to go ahead and try it myself. Getting the rod off wasn't too difficult but there isn't much room underneath the engine and one of the nuts was 'kin tight. There's not enough room to get a socket onto the nut so I used an adjustable wrench on that end, and a 22mm socket and breaker bar on the bolt head. Not recommended practice, but I was going to bin the bolts anyway. All out, and the bolts were "shouldered" and well in need of a change. The soft bits, once I'd cleaned the dust off, turned out to be blue Polybushes. These are often considered to be "better than the originals", partly because they're easier to fit without the need for the aforementioned 20 tonne press.


The bush at the chassis end had a tiny amount of play in it, but enough to hear a "click" when I was swinging on the rod underneath. From what I've read, this might be a source of the "wobbly wheel" we've been trying to cure for months. As the cost of a genuine new set, plus bolts, was less than getting all the wheels rebalanced, I thought it was worth a try. At a guess and based on what little reliable evidence I uncovered during the saga last year, these bushes had done about 20,000 miles.


They wouldn't push out so I burned them out with a blowlamp. A smelly, messy job but simple enough. Now to press the new ones in. Being the original rubber ones, I reckoned I could get them in using a bench vice and a couple of suitably sized sockets to do the pushing. Now, unless you've got a nice big vice, I wouldn't recommend this - as I turned the screw I could almost feel the metal wanting to explode under the pressure. However, it worked right up to the last 3mm or so, when I had to change to a slightly different diameter pusher...This then slipped and crushed the sleeve of the bush....oh dear! Or words to that effect.


Now, if I'd been anywhere remote then I'd have cleaned up the damage and carried on, but clearly not in this case. Once I'd got the damaged bush out - and this took an hour and a lot of smoke and chiselling - I was now faced with a choice - use the Polybush kit that I already had or have Ian Watt's team get another "proper" bush and press both of them in using a proper press. I chose to let the professionals do it. This involved a 48 hour delay as not one motor factor or dealer within 50 miles had another bush except the local Landrover dealer. And it cost FOUR times the price of the one I'd damaged, the alternative being to wait until I could get another by mail order.


Refitting the rod was simple enough although since I couldn't get a socket onto the nut I'd need a better way of tightening it - putting the torque wrench onto the bolt ain't a good idea. This required another investment of nearly a tenner at Halfords for a 22mm ring spanner. As there wasn't enough room underneath to get a decent swing on the thing, we had to get the front end on ramps and make a lever to put on the spanner...


...and since I didn't have a Sorcerer's Apprentice handy - Sue was busy - I needed a 3rd hand....


You can see that there's no room for a socket on the nut (at the back).


I had to guess at the 88Nm the nut needs. When I took the rod off the NS was quite loose compared to the OS, so I gave them a half turn past "V Tight" to make them "F Tight" and I think that'll do. A quick test drive and ....result! The wobble is no more! Cost? Well, given the need to buy the spanner and the very expensive new bush the bill came to very little less than if Sandy had done it all, but I've learnt a little bit more about Landrover fixing and that's always a Good Thing. He made no charge for the work he did, either. Polybushes? Despite all the hype I don't think that, in this case anyway, it's worth fitting them unless you happen to have a problem away from a decent workshop. I'll carry mine in the spares box because I won't need a press to fit 'em but I probably won't need to repeat the job for a long time yet.


Another good reason for doing the work myself is here:


This is the NS track rod end. If I hadn't been underneath doing the Panhard rod, I'd never have seen this. Given it was cold and wet I almost put this job off but eventually persuaded myself that I might as well get on with it since my hands were dirty anyway. Because at least one of these things seems to need replacing before every MoT test, I had a stock of spares on the shelf and the job took less than an hour. I'll still need to get the wheel alignment checked properly, though, since the outside of the NS tyre looks like it's getting a scrubbing, more so than the other side, anyway.


The last task was to clean off the oily gunk under the sump and oil filter. The reason for this was stated by PITA as a "leaking sump gasket". I discovered a few weeks ago that the oil was actually coming from a split in the crankcase breather hose so this has been replaced and we no longer have a little spot of oil underneath everytime I park. Cured? We'll wait and see but it looks good so far.


Friday, 10 November 2017

Oh the joy of a frosty morning and a cold spanner....

It's getting to that time of year again, cold and damp, and any thoughts of major work have been put on hold. With Elly in the garage there's only just room to close the door so working around her is difficult. However, there are some jobs that'll need doing before our trip next year so the local garage might get some more business since any major, or even minor work has to be done outside on the gravel and with little protection from the weather....

Fairly high on the Job Priority List will have to be the persistent fuel leak. Having chased this leak all over the place and sorted out various points that were clearly not as tight as they should be, we found that when we filled the long-range tank there were drips from the forward edge of the main tank. When the fuel in the LR tank dropped to about 10 litres - a guess since there's no gauge for it - then the drips stopped. Mike proved this by filling both tanks, moaned about the leak again and siphoned about 25 litres out again. I'll tell yer, sucking diesel through a plastic pipe is unpleasant enough anyway, but when you've got a beard for the stuff to splash into, well....makes a glass of wine taste a bit odd for a while. Anyway, the leak is coming from the top of the main tank where the fuel return goes in - or not, in our case. 


this diagram came from  https://www.landroverworkshop.com/diagrams/fuel-emission-systems/fuel-air-inlet-systems/fuel-tank-pump-and-mountings_53500


The cause is either a broken pipe - part 20 in the diagram, a broken seal (part 21) or a loose connection, all of which need the tank dropped to fix. With no ramp or sufficient muscle, this is a professional garage job. We'll just have to pick a time when the tank's almost empty. It's going to be expensive but the alternative is a smelly rear end, just like last time and not pleasant to sleep and eat with the smell of leaking fuel even if it's only a drip every minute or so. The fuel spreads out over the base of the tank and soaks up dust, which soaks up more fuel and so on until the whole of the underside of the tank, chassis and crossmember are thick with it. It'll be a good time to renew all the rubber pipes since they don't look too great either, and we'll do a proper job using proper parts on the tank breather (25-27) which we had to sort out in France this year.

Now that we've moved the Engel onto the "middle shelf" the Stealth Camper option is open again. With that in mind we've had another thought about blackout curtains. The curtain rod arrangement between the front and back worked but it was untidy and awkward to use. We need something that just fits onto the windows. Mike raided the scrapyard at work again and came home with a few metres of what looked like brown string. This is basically a fridge magnet - quite literally. 


If you strip the seal from a fridge door and cut it open the stuff inside is a strip of magnetic rubber that is strong enough to hold thin material against steel surfaces. Et voila! - the new blackout blinds! Made from bits of old tent - the really light stuff. The bits of Elly that aren't magnetic just had some bits of the brown string glued to it to fool the magnets that hold up the blind. If carefully fitted we've checked from the outside and no chinks of light leak out and because they're black the telltale sign that there's folk in residence isn't so obvious.


 We'll do something similar to hold midge netting in place as well. The doors and side windows get this treatment while the windscreen has a foil heat reflector painted black on the outer side and held in place by the sun visors. The blinds don't offer much in the way of heat insulation though, so we may still have to make some radiator foil - type liners for cold weather living.

Moving the fridge has meant we've lost the storage space for the spare gas bottle.


 We saw some very neat external carriers on some of the rigs at Stratford so we've made up something similar - but much simpler - that uses the ladder as a basic frame. The rest is made up from mild steel strip bent up on the bench and the hinge is a leftover from some DIY project.


The whole thing is rock-solid when closed with a bolt and wingnut, the other nuts are the anti-tamper square ones and there's a padlock to make sure we stay the rightful owners. With the roof tent in place we don't use the rear ladder anyway, so now it's working for a living.


The doors have had the security lock treatment but the windows are still vulnerable. Not much we can do about the front windows but a bit of work with the welding torch and Mike made up some grilles for the back that should at least make a casual tea-leaf have second thoughts. 


It was also a good time to finish off the inner door paintwork to match the outside and get rid of the previous owner's attempts to do the same but with a pot of Dulux and a yard broom. This aspect isn't really very important, but it's just a lot more rewarding to do the job properly instead of getting a little bit more irritated every time we look at something that we just didn't bother to do right the first time.


We've had yet another try at fixing the roof lining....this time we had to strip off everything previously glued - or rather, not glued - to the rear roof panels. We looked at buying some self-adhesive "egg box" sound insulation from Noisekiller but it's quite expensive and probably not very easy to clean either, so with loads of thick closed cell foam lying about we've tried again using that and some different glue.


This'll be the 4th attempt, having tried just about everything short of tile cement!

The bit over the cooker has radiator foil glued to it to provide a wipe-clean surface. We'll see how long it takes for this latest attempt to fall off!


Our requests for stickers to a number of off-road equipment suppliers has had some success. It'd be unfair to name those who didn't bother to respond - not even a "no, go away" - and that's disappointing. It might make the decision easier when it comes to spending money on replacement parts, though. Those who did respond - and some were very generous with their stuff - will get a mention at some point, either directly or in pictures, as well as some of our cash. A big "Thank You" to everyone who helped make Elly a little more "personalised".😎

Mike's been wanting to do a bit more painting - adding a stripe or two to Elly's flanks, but that will have to wait until the weather gets warmer/drier/less windy....next summer, in other words, and perhaps not even then. Oh, for a bigger garage!

....and finally....the Wobble is back. Despite having had both front wheels balanced there's still a really annoying "steering wheel wobble" at 50-55mph. This is just the speed we tend to spend most of our time. Having checked everything else, Mike is homing in on something called a Panhard Rod. I can see his legs sticking out from underneath, on the gravel, in the rain.....

Thursday, 5 October 2017

Show Time


Last weekend we took Elly on an outing. A 1200 mile round trip to Stratford-on-Avon and the annual Adventure Overland Show.


We last visited this venue 2 years ago and weren't greatly impressed with it. Having decided to give it another go, we were pleasantly surprised at the number and variety of trade stands, seminars and attendance from "PLU" - People Like Us - who really make an event like this special. Swapping ideas and experiences with fellow travellers opens up all kinds of possibilities and options.


There was so much going on we forgot to take pictures, so I guess you'll have to go to the site to get a feel for what was happening. Given the distance we had to travel we couldn't spend more than a day at the show, arriving on Friday evening and leaving very early on Sunday and some might say that the journey is too long for just one day, but what else is the truck for? We could've just gone down the coast and camped near the beach again, but this is a one-off and, as it turned out, worth the expense. It's certainly grown as an event since our last visit and we're glad we made the decision to go again. The only disappointment was a seminar that Mike especially wanted to listen to. Unfortunately what promised to be a valuable and informative session turned out to be nothing more than a "sales pitch" for the presenter's business. If that weren't enough the PowerPoint slide show was a shambles, with members of his support team trying to resolve it by crawling about the floor around his feet, pulling out wires, muttering suggestions and trying to be invisible. After 15 minutes of this we left, wondering whether we'd missed the point and it was supposed to be a comedy show....


We went down with a few bits and pieces of expedition gear that we had no use for - spare waffle boards, camp cots, ground anchors and the like that we hoped to sell. To carry the boards Mike made up a suspension system on the side, which is needed anyway as the only other place to put them is on the roof. We've found that if something is difficult to get access to, it doesn't get used, and having them on the roof makes this more likely. Moving them to the side means we're more inclined to use them than trying to manage without.


The side rails were put on a while ago, and the waffle board "sand ladders" are now hung between the rails. We started by fixing 2 gate hinge pins to the side, suitably backed by aluminium plates to spread the load. The slotted angle bracket is for a locking cable. 2 x12mm pin eyes fit over the hinge pins like this:


A bit of plastic pipe stops the thread from cutting into the board and the washer keeps the abrasive board surface from damaging anything on the hinge. The pins are long enough to pass through both of the 50mm boards and then large retainers - made from cutting discs - and wing nuts hold everything on. Extra support and security is provide by cam straps and a lockable wire. When not in use the pins lift off.


Extra support will be used with straps attached to the cargo rails.


Sometime I'll get around to drilling holes for R-clips in the ends of the pins, otherwise we'll inevitably lose the wing nuts at some point.


We sold the spare boards and invested some of the cash in a side mounted jerry can holder. We made some of these out of steel mesh for Daphne and they worked well enough for us to consider making some more. Luckily - and a bit cheekily as the show wasn't officially "open" when we descended like vultures- we found a Front Runner carrier that was also being offloaded by someone else. It was a bit ratty and rusted, but since these things are well made to begin with, this wasn't going to be a problem. A couple of hours cleaning and painting and it came up like new. These things are quite expensive so we got a bargain, I reckon. It needed a bit of modification to fit our set up since we have a full length rack and the top clamp is designed to fit the roof gutter so with the gutter already full of roofrack rail it wouldn't fit, to begin with, at least. We changed the clamp around a bit and, with the bottom brackets bolted through the side panels it's as firm as the DIY versions we made for Daphne.


We had to mount it partially over the driver side rear window since the waffle boards take up the rest of the space along the side. Luckily this window isn't necessary for clearance at road junctions, unlike the one on the other side, so this isn't much of a loss.
The set-up now looks a lot "busier" but at least more accessible in a hurry.

This retainer can be locked and the cap can't be opened without taking the can off the carrier.


One little problem we've been fighting with is how to fill the onboard water tank. Because the tube between the filler and the tank has a curve in it, the air in the tank can't get out as fast as the water from a hose or other filler is trying to get in. The result is a lot of spitting and farting with a lot of water coming straight back out again unless we fill the tank really slowly.... We needed some means of venting the tank during the filling process. I tried a breather tube alongside the main filler tube but all we got was water spilling inside which largely negated the advantage of an outside filler neck. There was also no way of judging how much water was in the tank or when it was properly full.


Mike fitted a push-fit pipe union to the top of the tank under the wheel arch. The "plug" is dead easy to pull out when filling the tank and lets the air out nicely. It also lets us know when the tank is nearly full. It might be a good idea to remove the plug when using the pump, too, as the breather in the filler cap is tiny - not much more than a pinhole -  and will probably get clogged eventually.


Having deliberated for weeks on the solution to heating the awning with the Frontier stove, we made a protective "register plate" for the flue from aluminium sheet and fitted it into the side panel ...


It's cut into an elliptical shape so the flue pipe can exit at a 45 degree angle. There's a waterproof cover for the plate for when we're not using the stove. I should've taken some photos of it in use at Stratford, but it works perfectly. The only addition might be some kind of "drip catcher" to stop rain from getting around the side of the flue and dripping onto the floor inside. This will only be an issue if we bother with a groundsheet, which is unlikely under the stove anyway.


The Engel fridge got it's first real outing as well. It's very efficient but heavy and large compared to the Waeco we've used before, so this limits the options for using the "double bed" sleeping arrangements. This is a very useful feature which we've used several times and around which the entire interior was designed, so we wanted to have this option restored. Mike cut a 50mm strip from the end of the kitchen worktop and built a shallow support that covered the water tank filler. This gave enough room to let us have the Engel along the side instead of the centre.


A trial run for the Engel in it's new stowage. The platform underneath it could perhaps have some drawer runners added so it'll let the fridge slide out...heavy though.


With the Front Runner Wolf boxes down the middle we have the double bed "Stealth Camper" option again. It would be nice to have the fridge slide out for easier access so we might look at some heavy duty drawer slides like we used before. The only real downside is the loss of access to the storage and, more importantly, fuses underneath. For that reason we'll probably only have this configuration when we definitely plan on using it. The rest of the time it'll be a possibility but would mean emptying the fridge before we can move it....lightweight it ain't! While we were messing about we moved the solar panel connectors for better access and tidied some wiring - all little snags discovered over the weekend. In this position the fridge does cover most of the blindspot window, but I can see enough over the top - just. Obviously we can't use the cool box extension on top unless we don't need access to the fridge at all, which isn't likely - the cold Prosecco needs to be available!


The heat insulation (camping mat) is beginning to fall off the roof. The bits towards the front seem to be OK but those over the stove don't want to stay in place. We'll have to experiment again with adhesives since the double-sided tape hasn't worked and neither did the spray-on "heavy duty" glue we tried after the first can ran out. That can worked well on the front pieces but the manufacturers have now changed the composition for (yawn) Health and Safety reasons and the new formula is hopeless.


Finally this month we gave some more thought to security. With Defender door locks being, shall we say, less than perfect I fitted a combination lock/sliding bolt thing to Daphne's driver's door, but this was troublesome if not used regularly as it tended to corrode just enough to make the tumblers tricky to operate. This time we decided to go down the "ugly but functional" route and use old-fashioned padlocks.


So, not pretty but pretty obvious (= deterrent) and needing some determination to break through. Quick and easy to use, too, so we're more likely to. We'll still use the Landrover door locks but the extra security defends against someone breaking a window and releasing them.
The back door has a similar arrangement but rather more robust. I'd have preferred similar locks for the front doors but there just isn't the room to fit them.


Next month we'll be starting the prep - slowly - for the next trip south to, well, hopefully the bottom of Western Sahara. We still need to do a bit more "camouflage" since some of the police in Morocco obviously thought we were something more than the usual tourists and we'd rather not make anyone suspicious enough to have us unpack the truck.
Quite apart from the hassle, a few slabs of San Miguel exposed to the sunlight might get us attention we can do without. A few advertising stickers might do the trick so we've written to a few places in the UK who might be kind enough to help. 
https://thumbs.ebaystatic.com/images/m/mXm6EV-rDRyBMQGCiGIk_pg/s-l225.jpg
We began to collect flags and the like this year to enhance the "I'm just here for the beach" image, but I think we might cover up the Catalan sticker we picked up in the Pyrenees before getting to Spain next year. Might not be popular or even legal by then.


We're also starting our collection of stuff for the First Aid kits that the chap in Mhamid and elsewhere asked for.

 http://www.medicine.com.au/wp-content/uploads/2015/09/6743276916.jpg

 I know a lot of us have a pretty cynical view of giving things to people down there and to some extent we agree, as you'll see from previous posts. However, our experience in 2016 suggested that there is a place for some carefully directed help. Have we, in our comfortable existence, ever been faced with a fifty mile walk to the dentist with a raging toothache? How about being stuck up on a desert plateau guarding the wildlife with a severe case of gutrot and nothing to help relieve it? A nasty cut on your foot that isn't going to heal unless you can keep the dirt out of it, but the closest Elastoplast is a 2-day hike away? We think a few carefully-targeted packages could make someone's life a bit easier. What's to lose?