Having arrived back in the Highlands at 3am I had a few hours sleep before setting off for work, dropping the truck at the garage on the way. Picking it up a few hours later the news about the bulkhead rust wasn't good but could've been a lot worse.
 |
| If a ship had a bulkhead like this it'd sink. This is the view after the dash was removed. |
We needed to weld a patch to reinforce the hole next to the pedal box and this would need me to strip the dashboard down to the frame. Since the strip down would take about a day and the welding about 15 minutes we decided that I'd take the truck home and bring it back when I'd taken everything off and prepped the area for the work.
Once everything was out of the way the hole finished up being quite a bit bigger after I'd cleaned all the crud away, treated the rust and primed it.
 |
| Painted with weld-through primer from Screwfix - and it actually works. |
Easy enough to fix after that and we took the opportunity to treat a couple of other dubious areas in the footwells.

All sorted and the vendor met me halfway with the cost. However...while taking the dash off I had to move several other fittings out of the way to protect them from the welding. Like the seats. This wasn't too difficult as they weren't exactly bolted down in a crash-proof fashion. A mixture of the correct Landrover screws, roofing bolts and other random hardware. One bolt was undersize but had been padded out with insulating tape and jammed into the hole. One fixing was missing completely so the passenger seat could move about. They looked good, though. I didn't, apparently, I looked annoyed....
Then the battery. Remember the battery that I "might like to check"? I had to take the seat off, I thought, to get access since it was an after-market upgrade with no removeable seat base. Nice seats. Very comfortable, like he'd said. Once I'd taken the seat off I realised the seat box had been cut away on the outside to allow access to the battery - much like I'd done under Daphne's driver side - but it was covered and hidden with the rubber mat. Nothing lost in terms of time though as the seat was ready to fall out anyway. The battery was revealed, clinging to the car by it's fingernails, metaphorically speaking. The usual metal retaining strap wasn't fitted although someone had made a half-hearted attempt. The reason it wouldn't fit was the battery tray - a new one- was too long to fit into the battery box so was sitting at an angle, sloping down from front to rear. The battery, secured by friction and gravity, had slid to the length of the cables where it stopped, an inch away from shorting the live connector on the bodywork. I think I might've looked annoyed again.
The radio. Nice unit. Expensive, I guess.

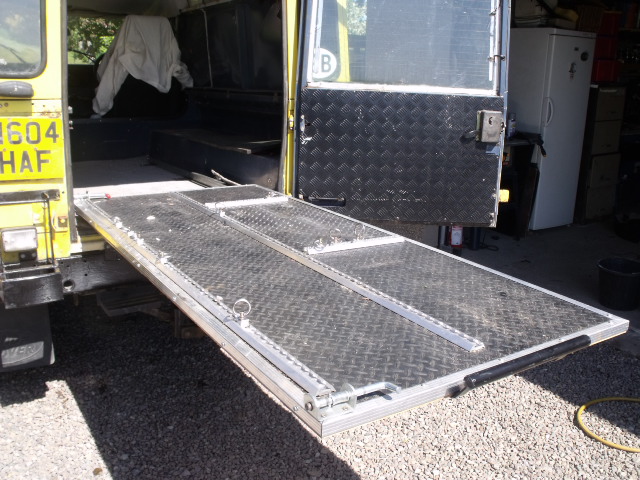
Turning to the other end of the box....an odd smell. The heavy duty wooden shelving system was well soaked in old oil, like the floor in an ancient engine shed. Black and malodourous, they had to come out. The floor lining - plywood - was in the same state, if not worse, and had to go. To do this I'd have to remove the "SAS Special Vehicle" sliding tray thing.

Behind the shelves was building insulation or rather, what was left of it after a colony of mice had finished with it.

Amazing creatures. The 50mm thick panels had been hollowed out leaving a pile of chewed foam and a wafer-thin skin full of air that looked perfectly normal from a casual glance. All this formed a large pile which grew bigger as more useless weight came flying out.
 |
| carpet and insulation (and mouse droppings) out |
After another hour we got down to the metal
 |
| These are the ones that came out easily |

We eventually removed 78 "fixings" of various sorts, all of which had created a hole to the outside world that had no sealant, hence the mess under the plywood.
Perhaps it's the time to explain how our new truck was initially named. A long time ago, Sue and I bought a property that'd been "renovated" by an architect who boasted of his expertise in restoring old houses. We were confident, then, that all the work would be to the normal professional standards. Oh Dear. How wrong we were. This "expert" had done a lot of the work on our 16th Century cottage himself. Nothing wrong with that, but when, as the new owner, you're inspecting or dismantling his work you find that instead of using the conventional fixings for things, he'd made use of a biscuit tin full of random nails, screws and bolts. This made dismantling the amateur DIY work quite a challenge and a source of endless frustration. His name was Willoughby Fletcher. When you have to take a kitchen apart and find six different types of fasteners when one would do, you get the feeling that something might not be right.....Now, how does that translate to our new Landrover....why use one type of fastener when 6 will do? And don't bother with properly sourced and spec'ed screws, bolts and nuts; just use whatever is lying around. If you happen to be building a house this might be any old stuff from the local hardware supermarket. Or that biscuit tin full of stuff you removed from Granny's bathroom and knew would come in useful one day.
So, add the moisture to the mouse shit etc and no wonder it niffed a bit back there. Each hole had to be cleaned up and sealed with aluminium tape inside and mastic underneath - we couldn't think of a better way to do this. There'd also been quite a bit of water getting between the tub and the side panels and running down behind the insulation, staying invisible as a result. The lesson here, we'd already learned, is to have the means of inspecting all these vulnerable areas in a Defender, and there are a lot. We slackened the fixings on the panels and on both sides of the foam strip injected the best sealant we could find that wasn't silicon and tightened it all up again. Leaks fixed.
Another 15 metres of redundant wiring came out, and a circuit breaker panel that wasn't connected to anything, the remains of some auxiliary lights and a lot of tatty foil insulation. This gave us a blank canvas on which to work and we took stock of what we'd removed and what could be re-used. The base and rubber of the sliding tray were clean and in good condition, as were parts of a shelving system (not the oily one) and the CB panel would be useful. Everything else was junk.
I wish now that I'd taken a photo of the trailer full of jetsam that this "little job" had generated. I'd planned on re-using a lot of what we'd now have to throw away. You might be excused for thinking that I'd wasted a lot of money on this, but we always knew that we'd have to "redevelope" the living space according to the lessons we'd learned with Daphne, so this wasn't much of an issue. Just as well. There'd been a lot of work to do that we hadn't expected and quite a lot more to get things properly sorted. With this clear, we decided to take the vehicle off the road while we did it - SORN it, in UK speak - and reclaim the Road Tax which still had 11 months to run. We'd save it for when we were ready to go on the road, we thought. Right? Wrong....
No comments:
Post a Comment